AI Magic Menu
☑️ Location Owners
-ff27cddc3394f5d70be3b669eb71ecd8.png)
In unTill Air, you can speed up the onboarding process by generating your article list automatically using AI-powered menu recognition. This feature converts your menu into structured Back Office data. This way, you don’t have to manually enter data article by article, making the process quick and simple so you can proceed directly with testing the POS system.
You can upload your menu as images, PDF files, or excel sheets. The system will extract the necessary information to create articles in Back Office, including article names, prices, departments, VAT groups, and courses.
This function is currently available only in the Netherlands, Germany, and the UK for locations with the Food and Drinks business type.
Turn a file into a digital menu
To turn your menu file into articles in Back Office, please follow these steps:
- Go to Back Office > Products > Articles and click the 'Set up your menu in 1 minute with AI' button.
- Click ‘Upload files' and select your menu files (images, PDF, or Excel).
Before uploading your images, please make sure the text is readable and that essential details (such as prices) are visible so the system can extract all data correctly. Please note that the system requires products to have visible prices. Menus without prices cannot be processed correctly, and you will not be able to create or select items from them.
Images can vary in quality — for example, photos of chalkboard menus are also supported, as long as the text is legible. You can take a photo of your menu using your phone or tablet and upload it directly.
- Once a menu file is selected, wait until it has been verified, then click 'Use these files' to proceed. Some articles may require manual verification before being added to your menu.
For each uploaded and verified file, you can access an AI report with details about the extraction process.
Please note that files with failed recognition should be deleted and can be replaced.
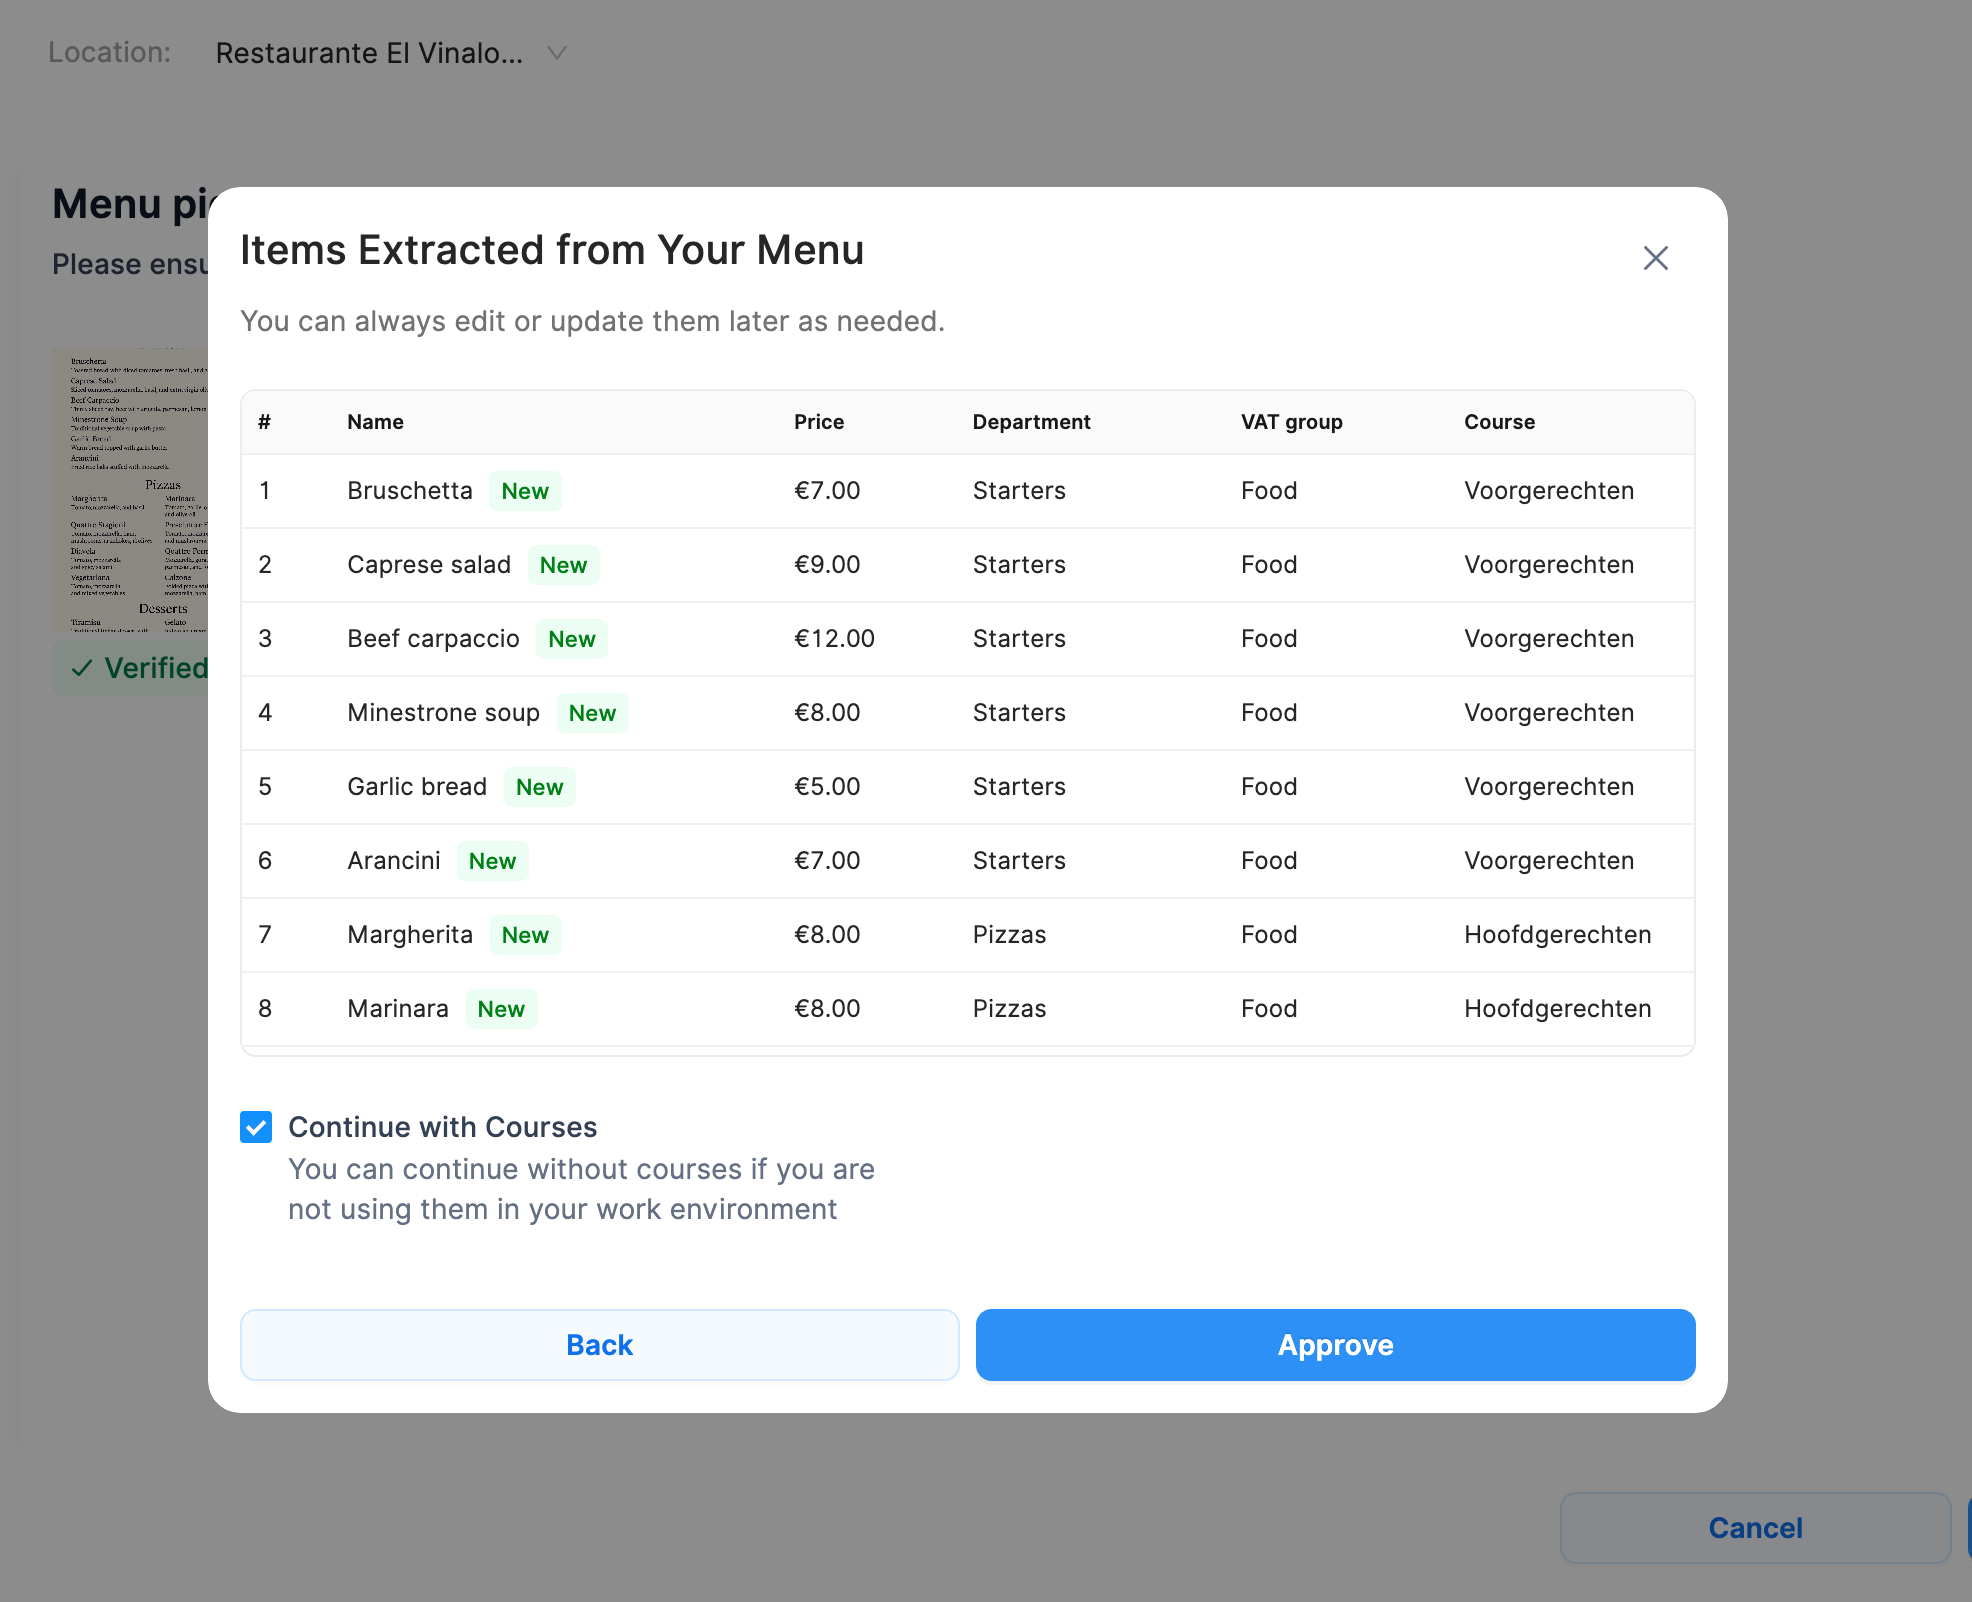
- You will now see a list of all items extracted from your menu, including each element’s details (Name, Price, Department, VAT group, and Course). Any missing information will appear as an empty field, which you can edit manually later. Click ‘Approve’ to confirm the new items.
-282efb8ce36a8db1936b210ca67884ac.png)
- After creation, you can view all new and previously existing items on the corresponding Back Office pages. By clicking ‘Proceed to Articles’, you will be automatically redirected to the Articles page, where you can view all your articles sorted by Department and edit their details.
Tip: After completing the process, you may need to assign printers to the new articles and set up preparation areas to ensure that order tickets are printed correctly. For more details on managing articles, refer to this page.