POS Intro
What is the POS?
POS (Point-of-Sale) is a system that lets you register sales. Here you can order Articles, Menus, Combi deals, apply Discounts, accept payments, and much more.
While POS Users do not have the authority to modify the Space configuration, manage Articles, and set prices (except the Articles designated as Articles with the Open price), they are responsible for handling orders and accepting payments in the unTill Air app on your screen.
POS Users
POS Users can be added to unTill Air through the Back Office by the Location Owner. Each waiter is granted a unique User code to access the unTill Air app, along with permissions to make voids and transfer tables.
In the POS, users can take advantage of a variety of features designed to meet customers' needs. Once these features are configured in the Back Office, POS Users can utilise them in daily operations.
Examples of these features:
- Transfer table
- Fire next course
- Change course
- And more...
Navigation in the POS
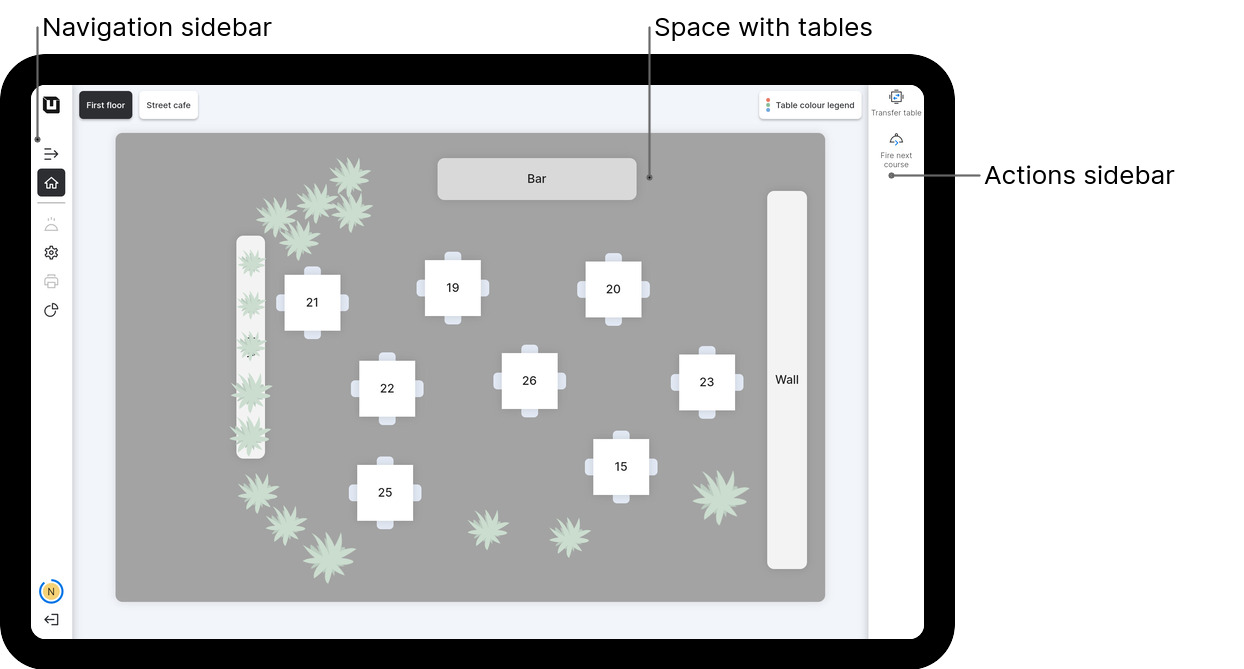
-977ff5639e048f271966cff4fc922812.jpg)
The POS interface has buttons on both, the left and right sides. Buttons on the left side help in the navigation between sections 'Home page' (Space), 'Order screen', 'Control screen', 'Printer management screen', and 'Reports'. The right sidebar has a range of features designed to perform specific actions with the order.
Examples of these features
To learn what the icons in the POS look like, refer to this page.
Spaces within the POS
In the POS, you have the ability to switch between different existing Spaces and process orders in each of them.
Tip: You can customise your Space in the Back Office to get a more realistic table representation in the POS. For more details, refer to this page.
Confirm order in the POS
Confirmation of the order results in the previously ordered Articles being printed on the relevant printers, and the kitchen staff begins preparing the dishes at that moment.
In unTill Air the confirming of the Articles happens in two situations:
- Pressing the green button

- Clicking 'Checkout'
Without confirmation of the order, the Articles will not be printed on the printers nor prepared in the kitchen.
Note: If you tap on the closing red button, you will leave the order screen immediately without the order confirmation. So, all the changes you made are going to be lost in such a case.
Closing red button
To cancel any unconfirmed changes and exit the order screen, tap the 'red button'. All unconfirmed changes will be discarded. However, if the order has confirmed changes, the order itself will not be lost.

Checkout and payment screen
When the POS User taps on the 'Checkout' button, they will be instantly redirected to the payment screen where they can proceed with accepting the payment using different payment methods configured in the Back Office.
Also, on the payment screen, the POS User is able to split the bill and add tips.
To go to the payment screen, you need to tap on the 'Checkout' button.
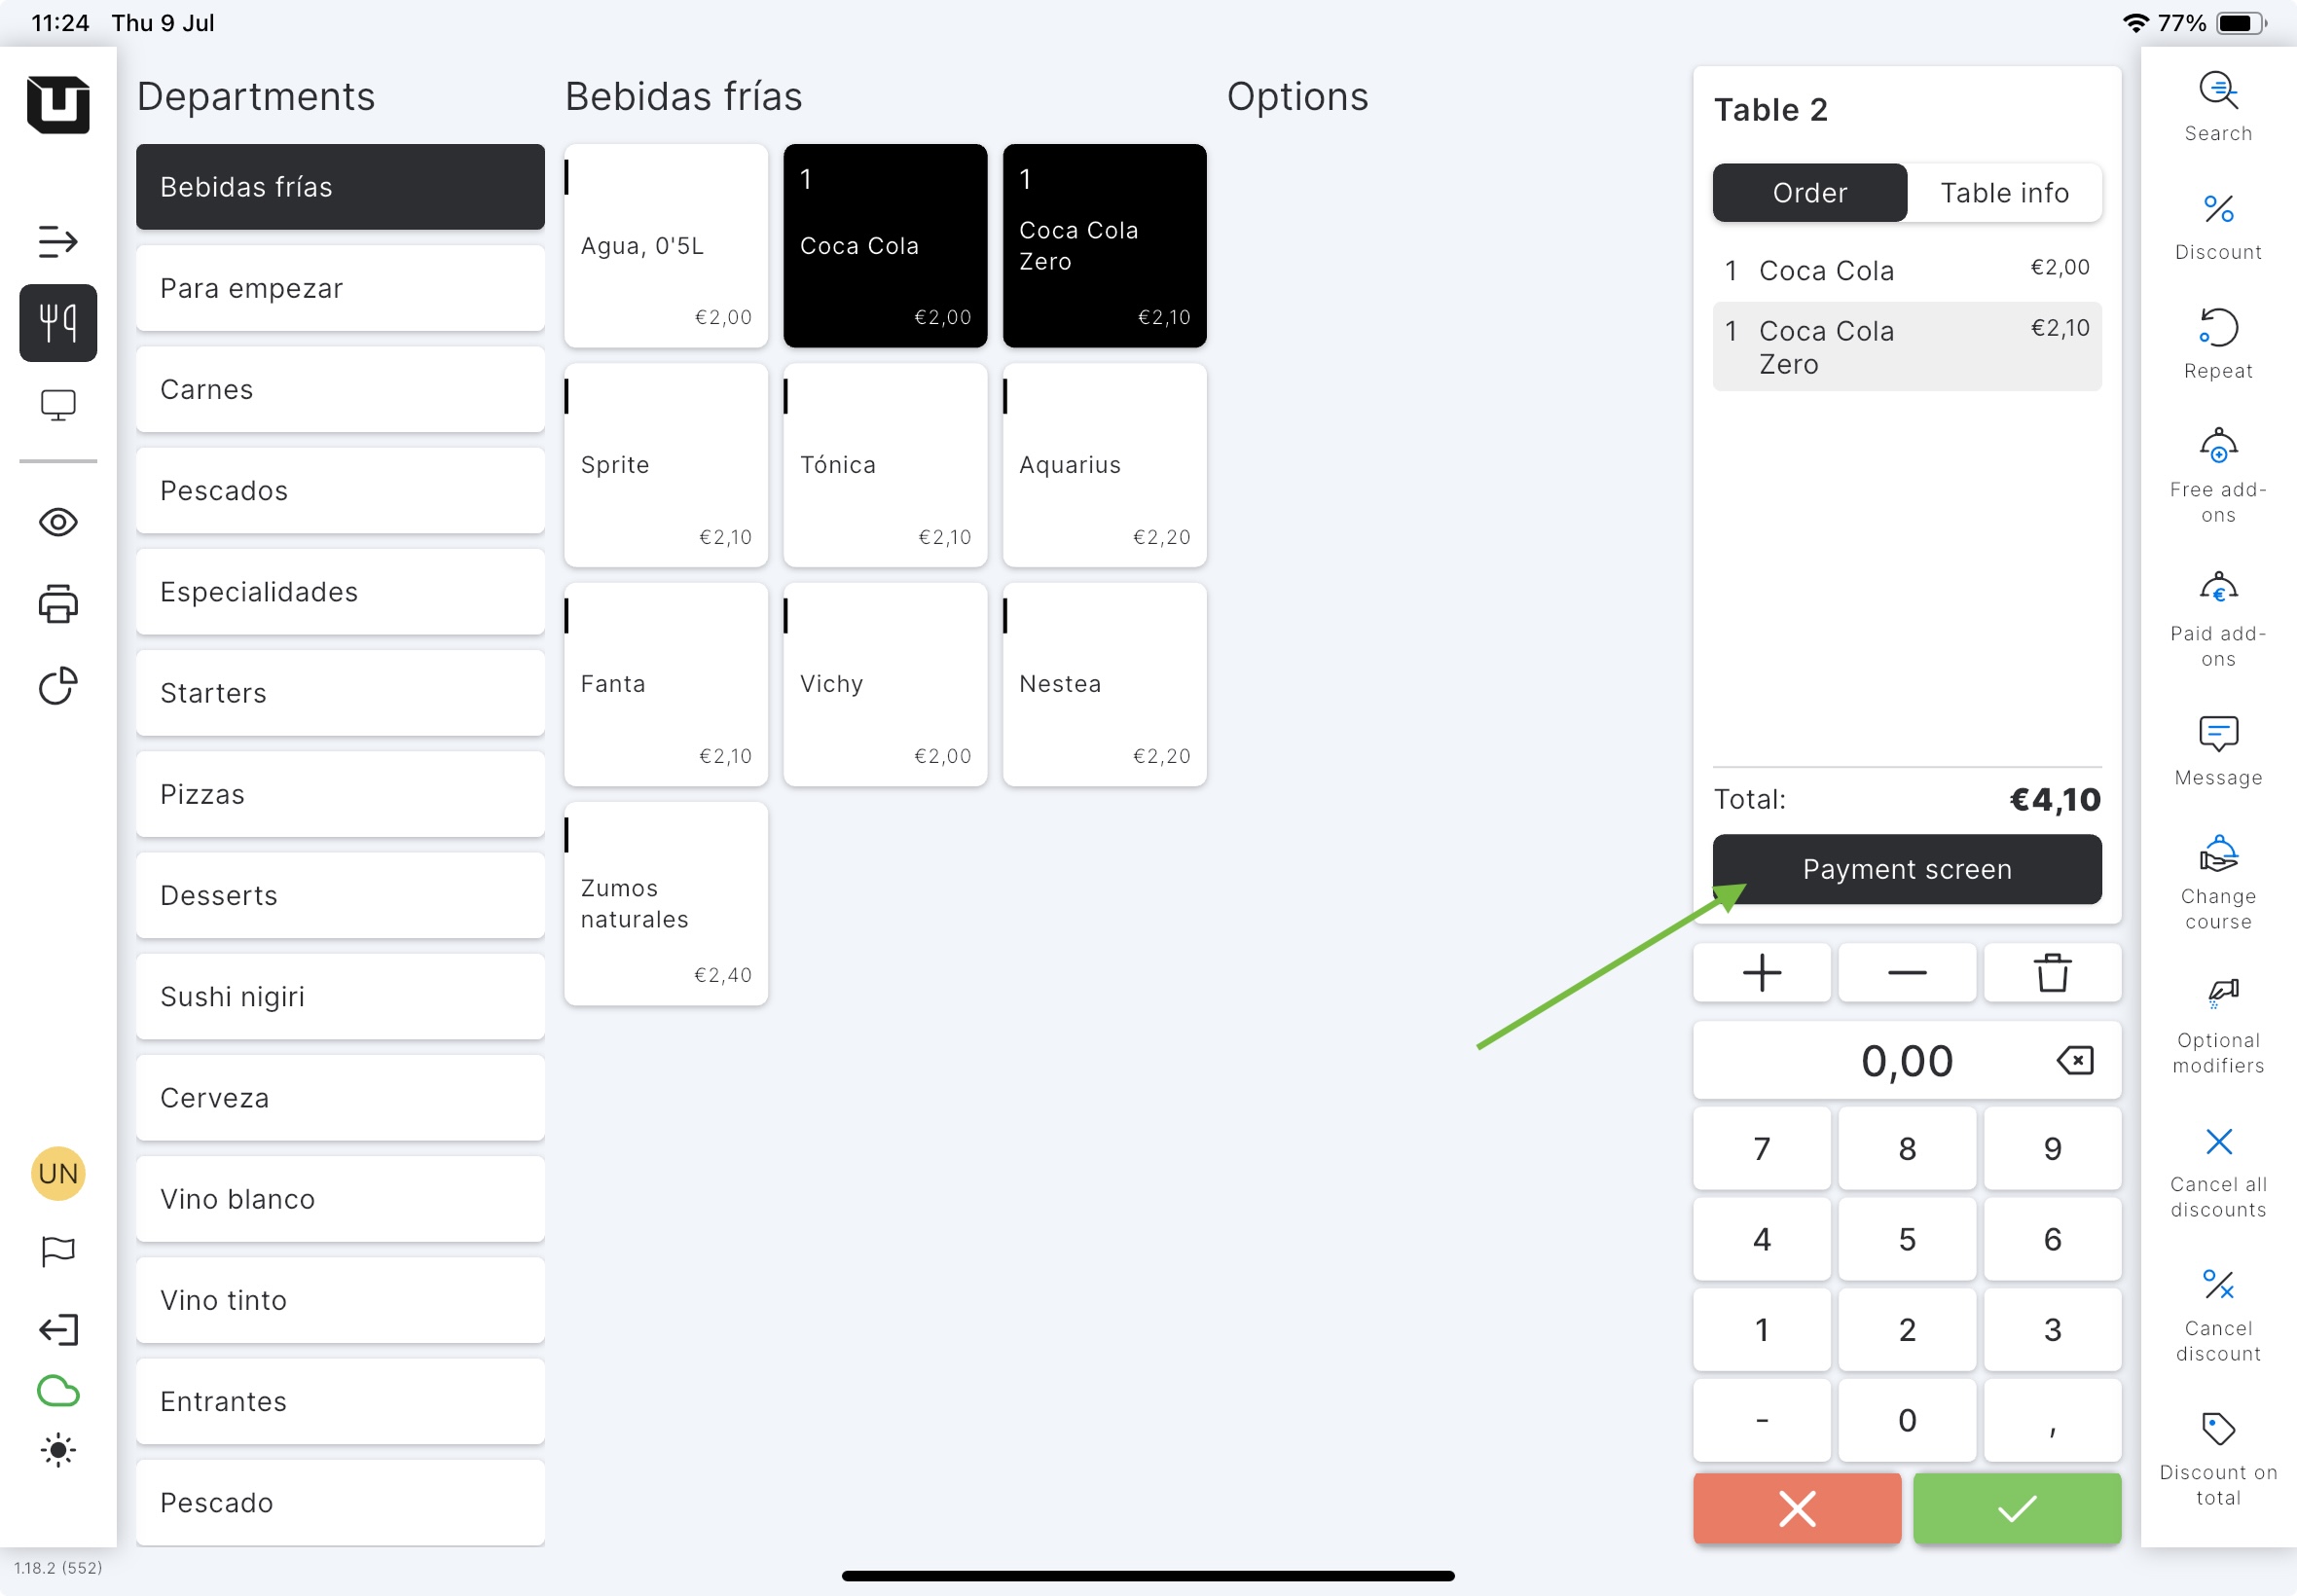
Tip: When checking out in Direct sales mode, you can either access the Payment screen with its payment options pressing the corresponding button or select 'Cash' or 'Card' to proccess the payment directly without opening the Payment screen.
Page functions and tips
Using this page functions you can speed up the ordering process making the system even more user-friendly.
Numeric keypad
While ordering in the POS you can use the numeric keypad to make this process quicker and easier.
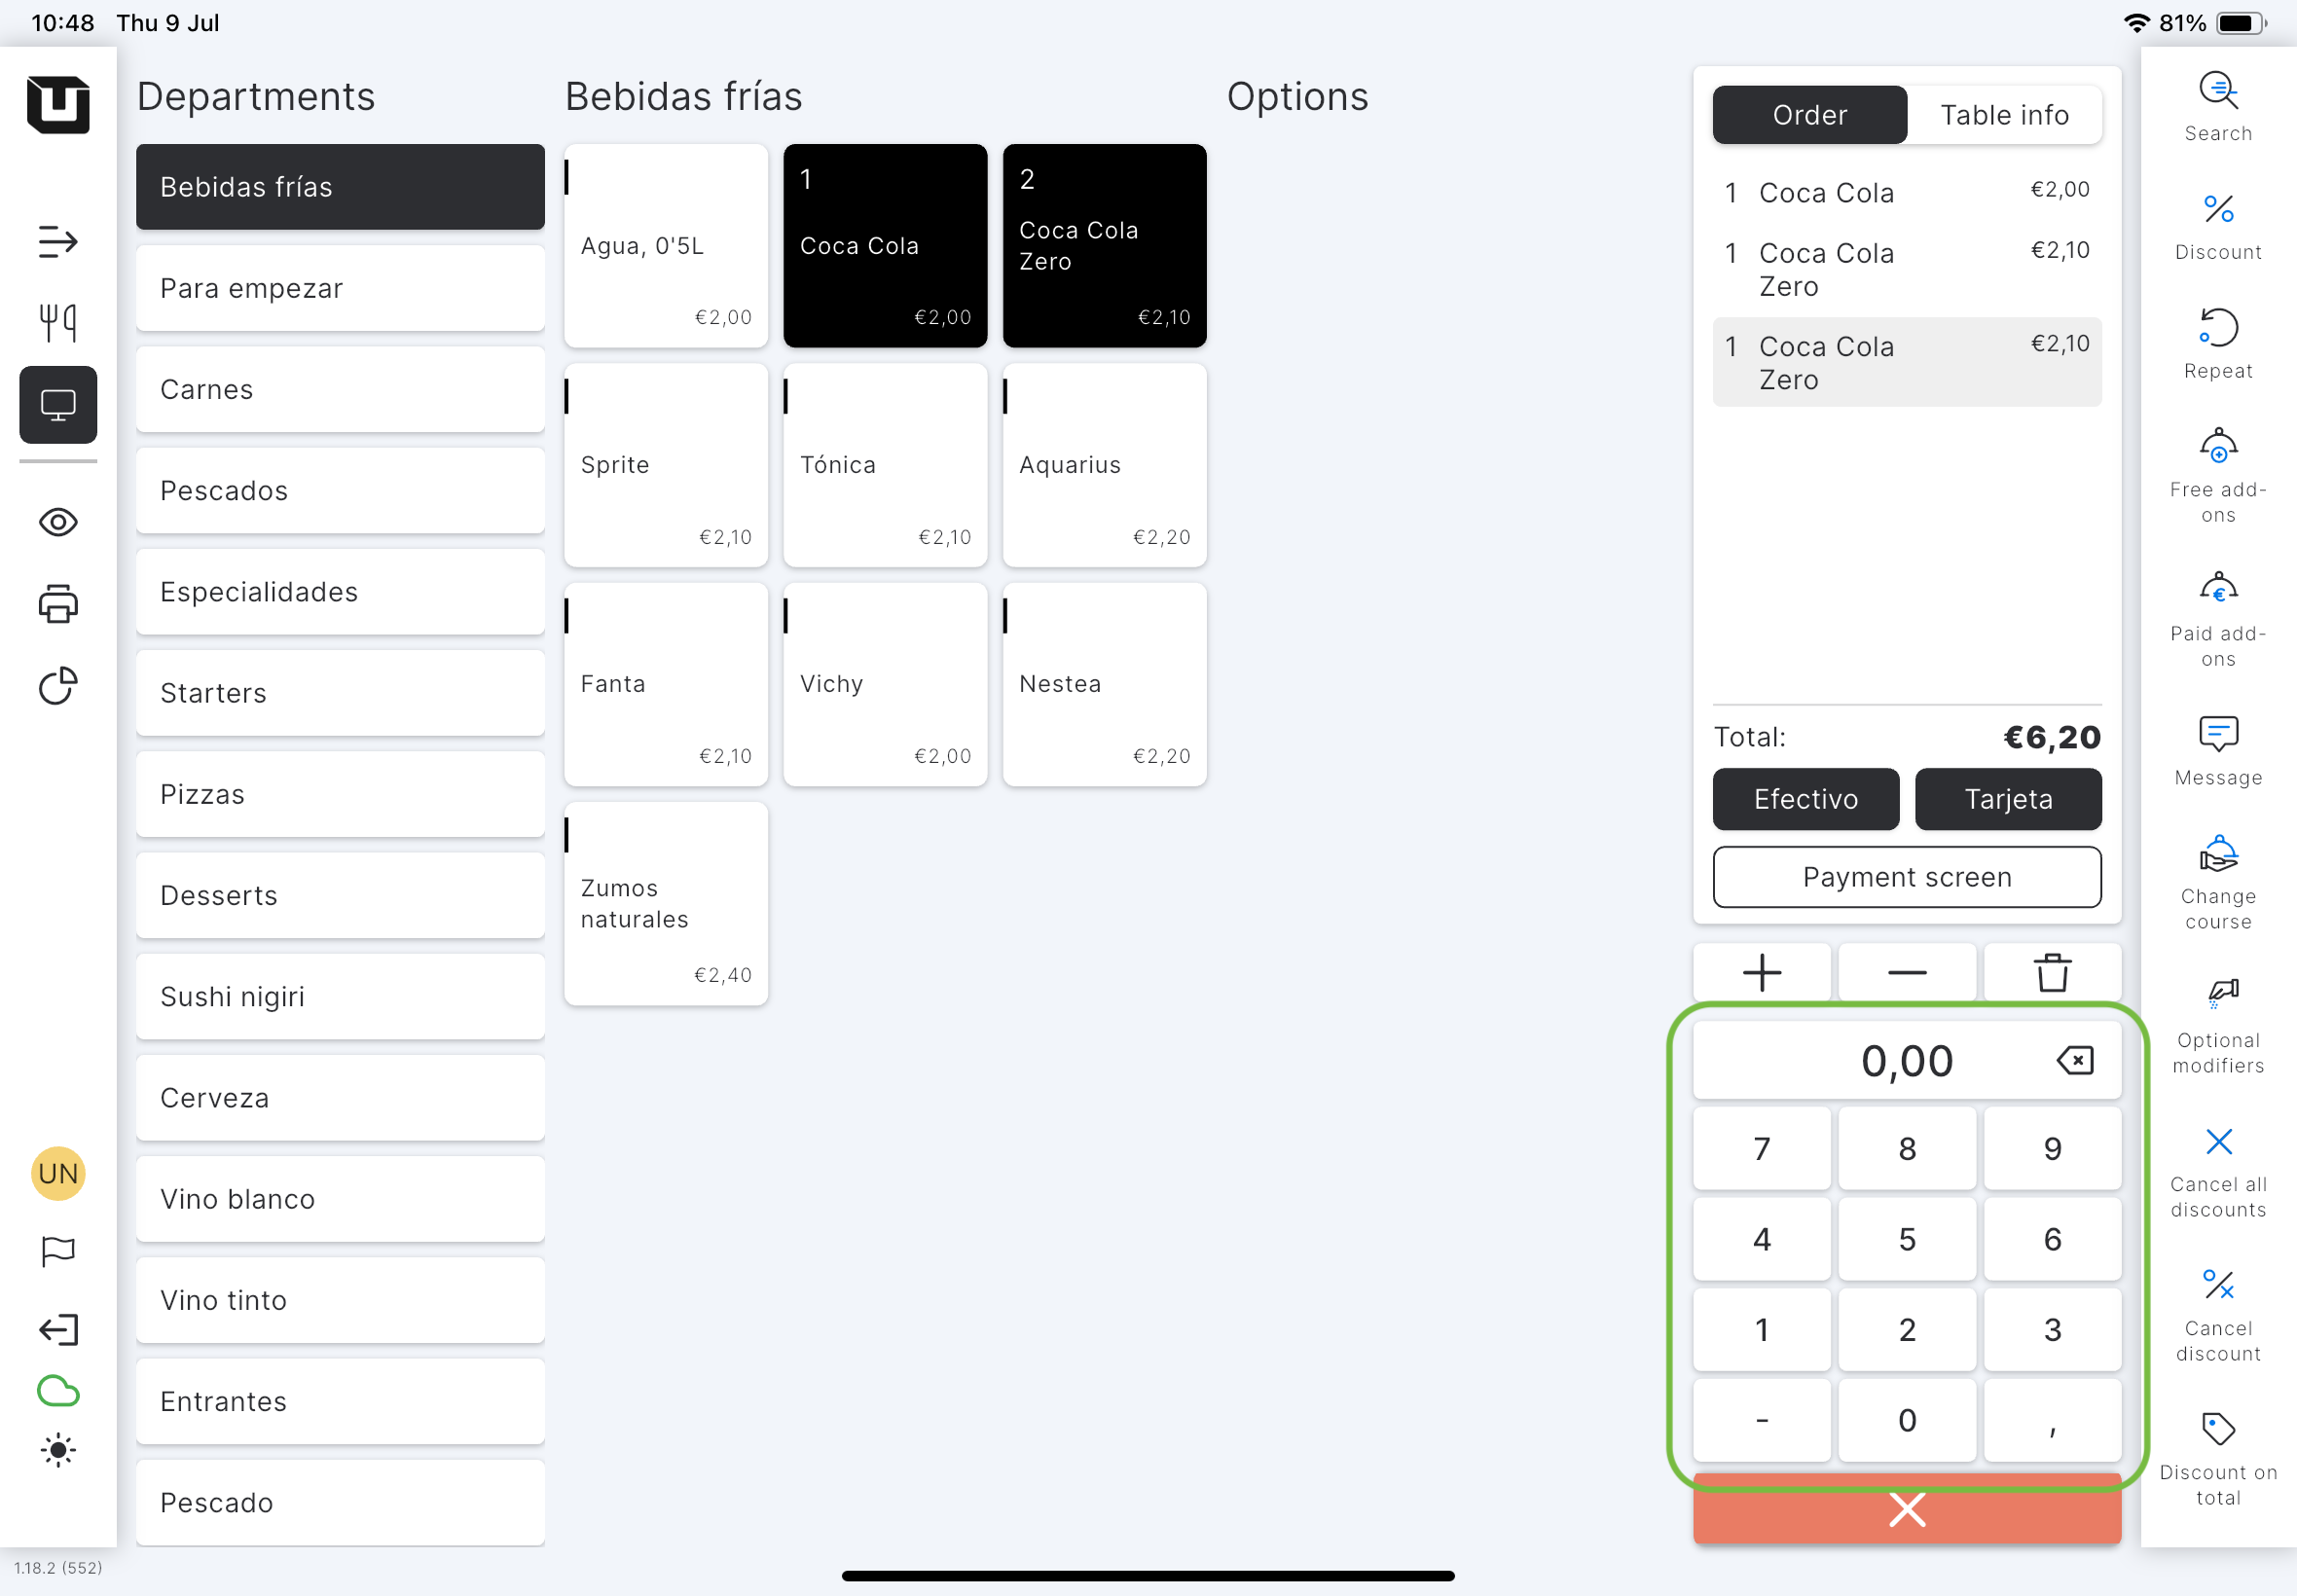
Enter the number and then tap on the Article to order it, you will see that the specified quantity of Articles has been added to the order.
The same process applies if you wish to void several items. Select the required Article, enter the quantity, and void multiple Articles instantly.
To make the numeric keypad appear on the phone and order multiple Articles, you need to long tap on the Article tile. For details about the differences between the phone interface and the tablet interface, refer to this page.
On tablets, you can call a numeric keypad additionally the same way as on phones, by long-tapping on the Articles. Once long-tapped on the Article, the pop-up with a numeric keypad will appear and you can enter the desired product quantity.
Swipe items
You can speed up the ordering process by swiping into the side. If you swipe into the right side, you remove the item from the order. Swiping into the left side results in repeating this product.
-2e84ef4c3fc81dc6fa7c026d4c6618ff.png)
Minus & plus icons
Using these two icons you can add/remove unconfirmed Articles in the order list one item at a time. First, select the desired Article and then tap on the relevant icon.
Trash icon
An icon featuring trash is equivalent to the Void button located on the right sidebar. You can select a specific Article and void it by tapping on the 'trash' icon.
Double tap
While splitting the bill or transferring a table, you can double-tap on the item to bring up the numeric keypad. Then, you can enter the number of Articles you wish to split or transfer.