Manage spaces
☑️ Location owners
To manage your space, please follow these steps:
- Navigate to spaces.
- Click 'Add new space'
- Give a name for your new space.
- Specify the number of its tables.
Note: If you create a space with the 'direct sales area' feature, you do not need to specify the number of tables. Upon checking the checkbox, the fields 'Number of tables' and 'Start from' will disappear.
- While creating a space, you can assign departments / articles. Select departments/articles you want to sell in this particular space. You can also create multiple spaces and assign articles in your location differently based on their location (e.g. you're able to sell particular products only inside of the restaurant and not on the terrace or vice versa).
- If you use a direct sales area feature for this specific space, tick the provided checkbox. This feature allows you to assign a screen to this space and use it for direct sales only. Other devices that work in table plan with other spaces will not see this space.
- If you use a special price for this specific space, tick the provided checkbox. This feature lets you set a specific pricing for this particular space (e.g. you can set lower prices on the terrace for desserts compared to the prices inside).
- If you use a secondary VAT for this specific space, tick the provided checkbox. If in your country there are different VAT levels applied depending the location where the products are sold (e.g. inside vs terrace), you can set different VAT levels through this feature.
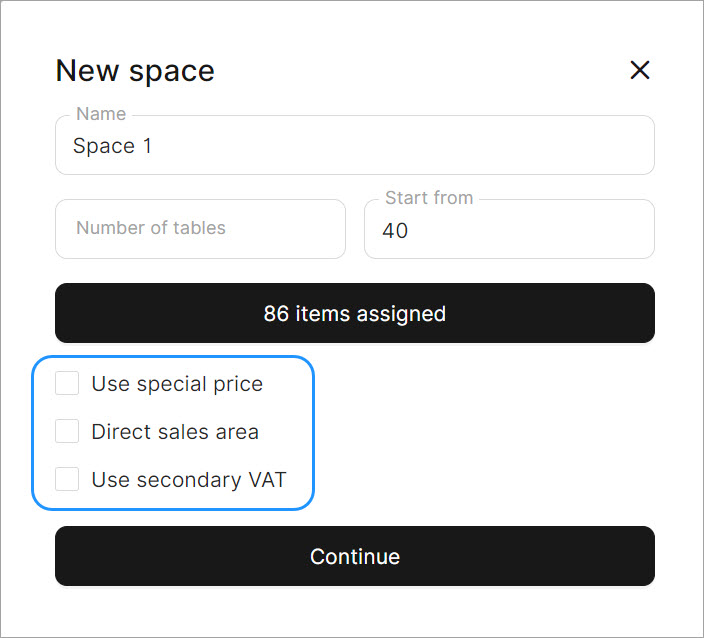
- Click 'Continue'.
- Click on the icon featuring a pencil.
- Here, you will find a 'Table plan editor' section. Within this section, you can:
- Add new tables and rearrange existing ones
Tip: You can use the grid functionality to move tables. To do this, click on the button as shown below. Then, move the tables using directional keys on your keyboard.
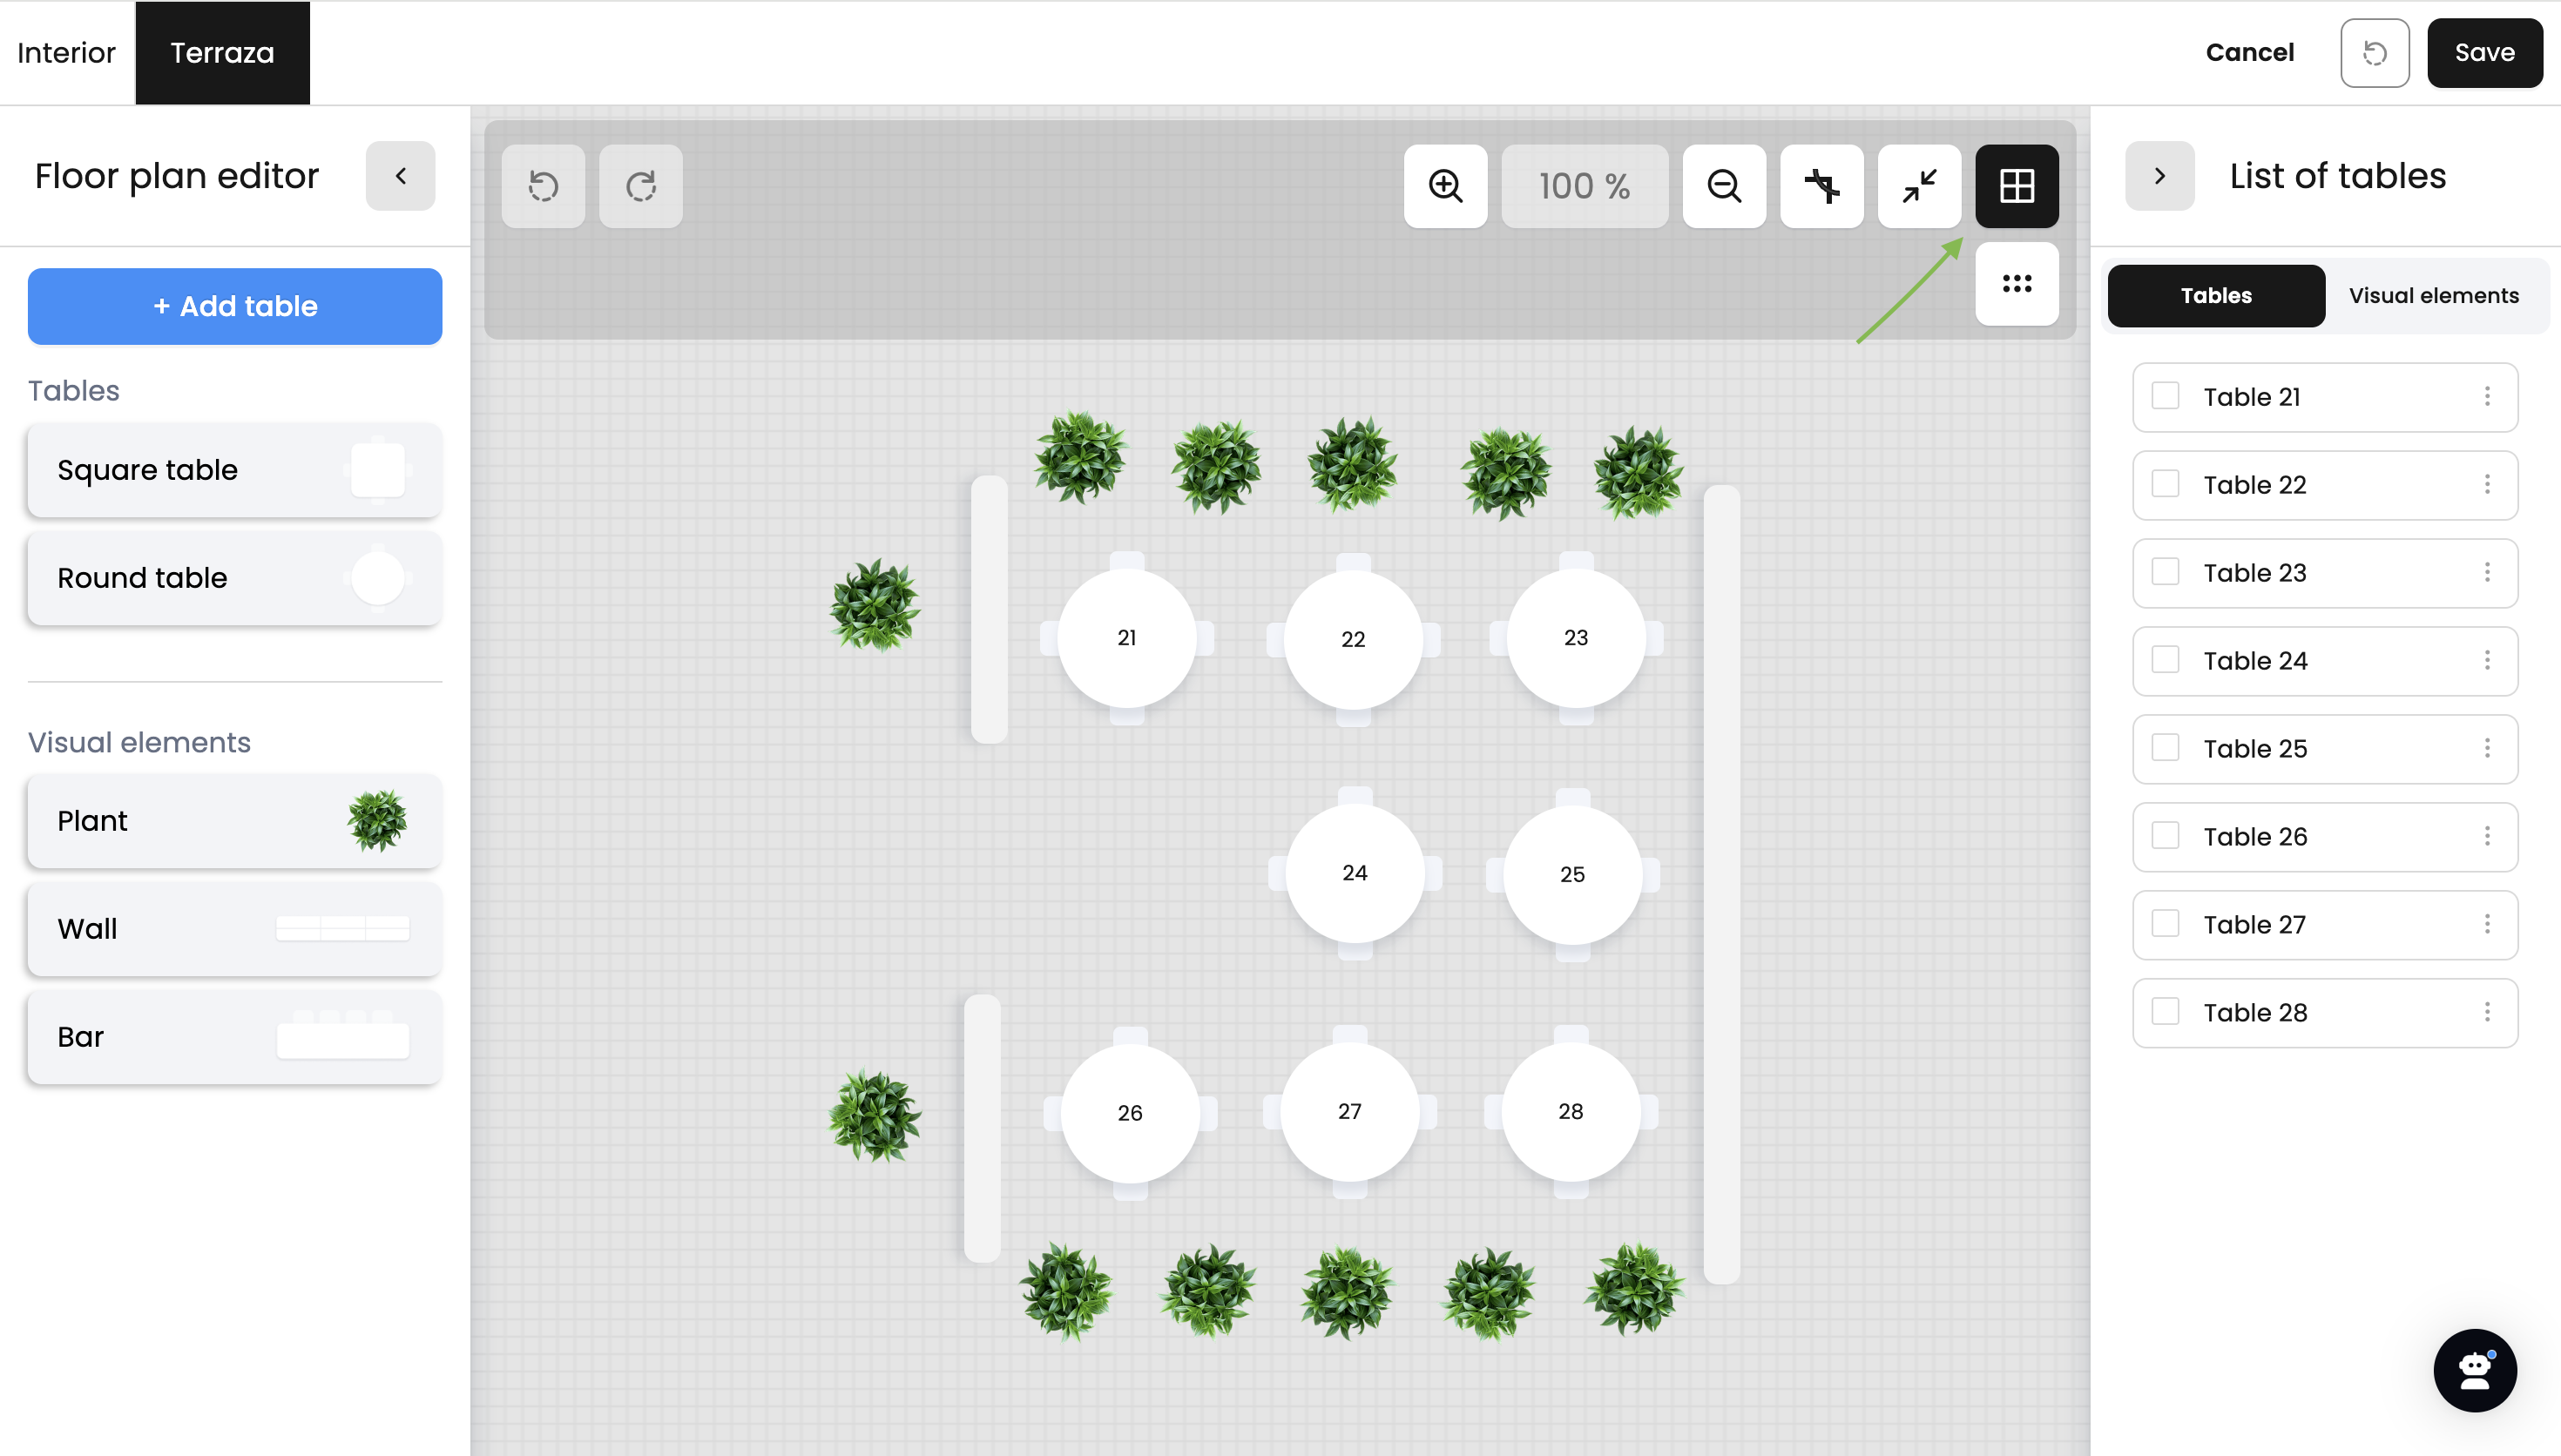
- Define the table characteristics: shape, height, width, and rotation angle;
- Duplicate the table. After initiating this process, you will need to drag the completed copies away from the initial table.
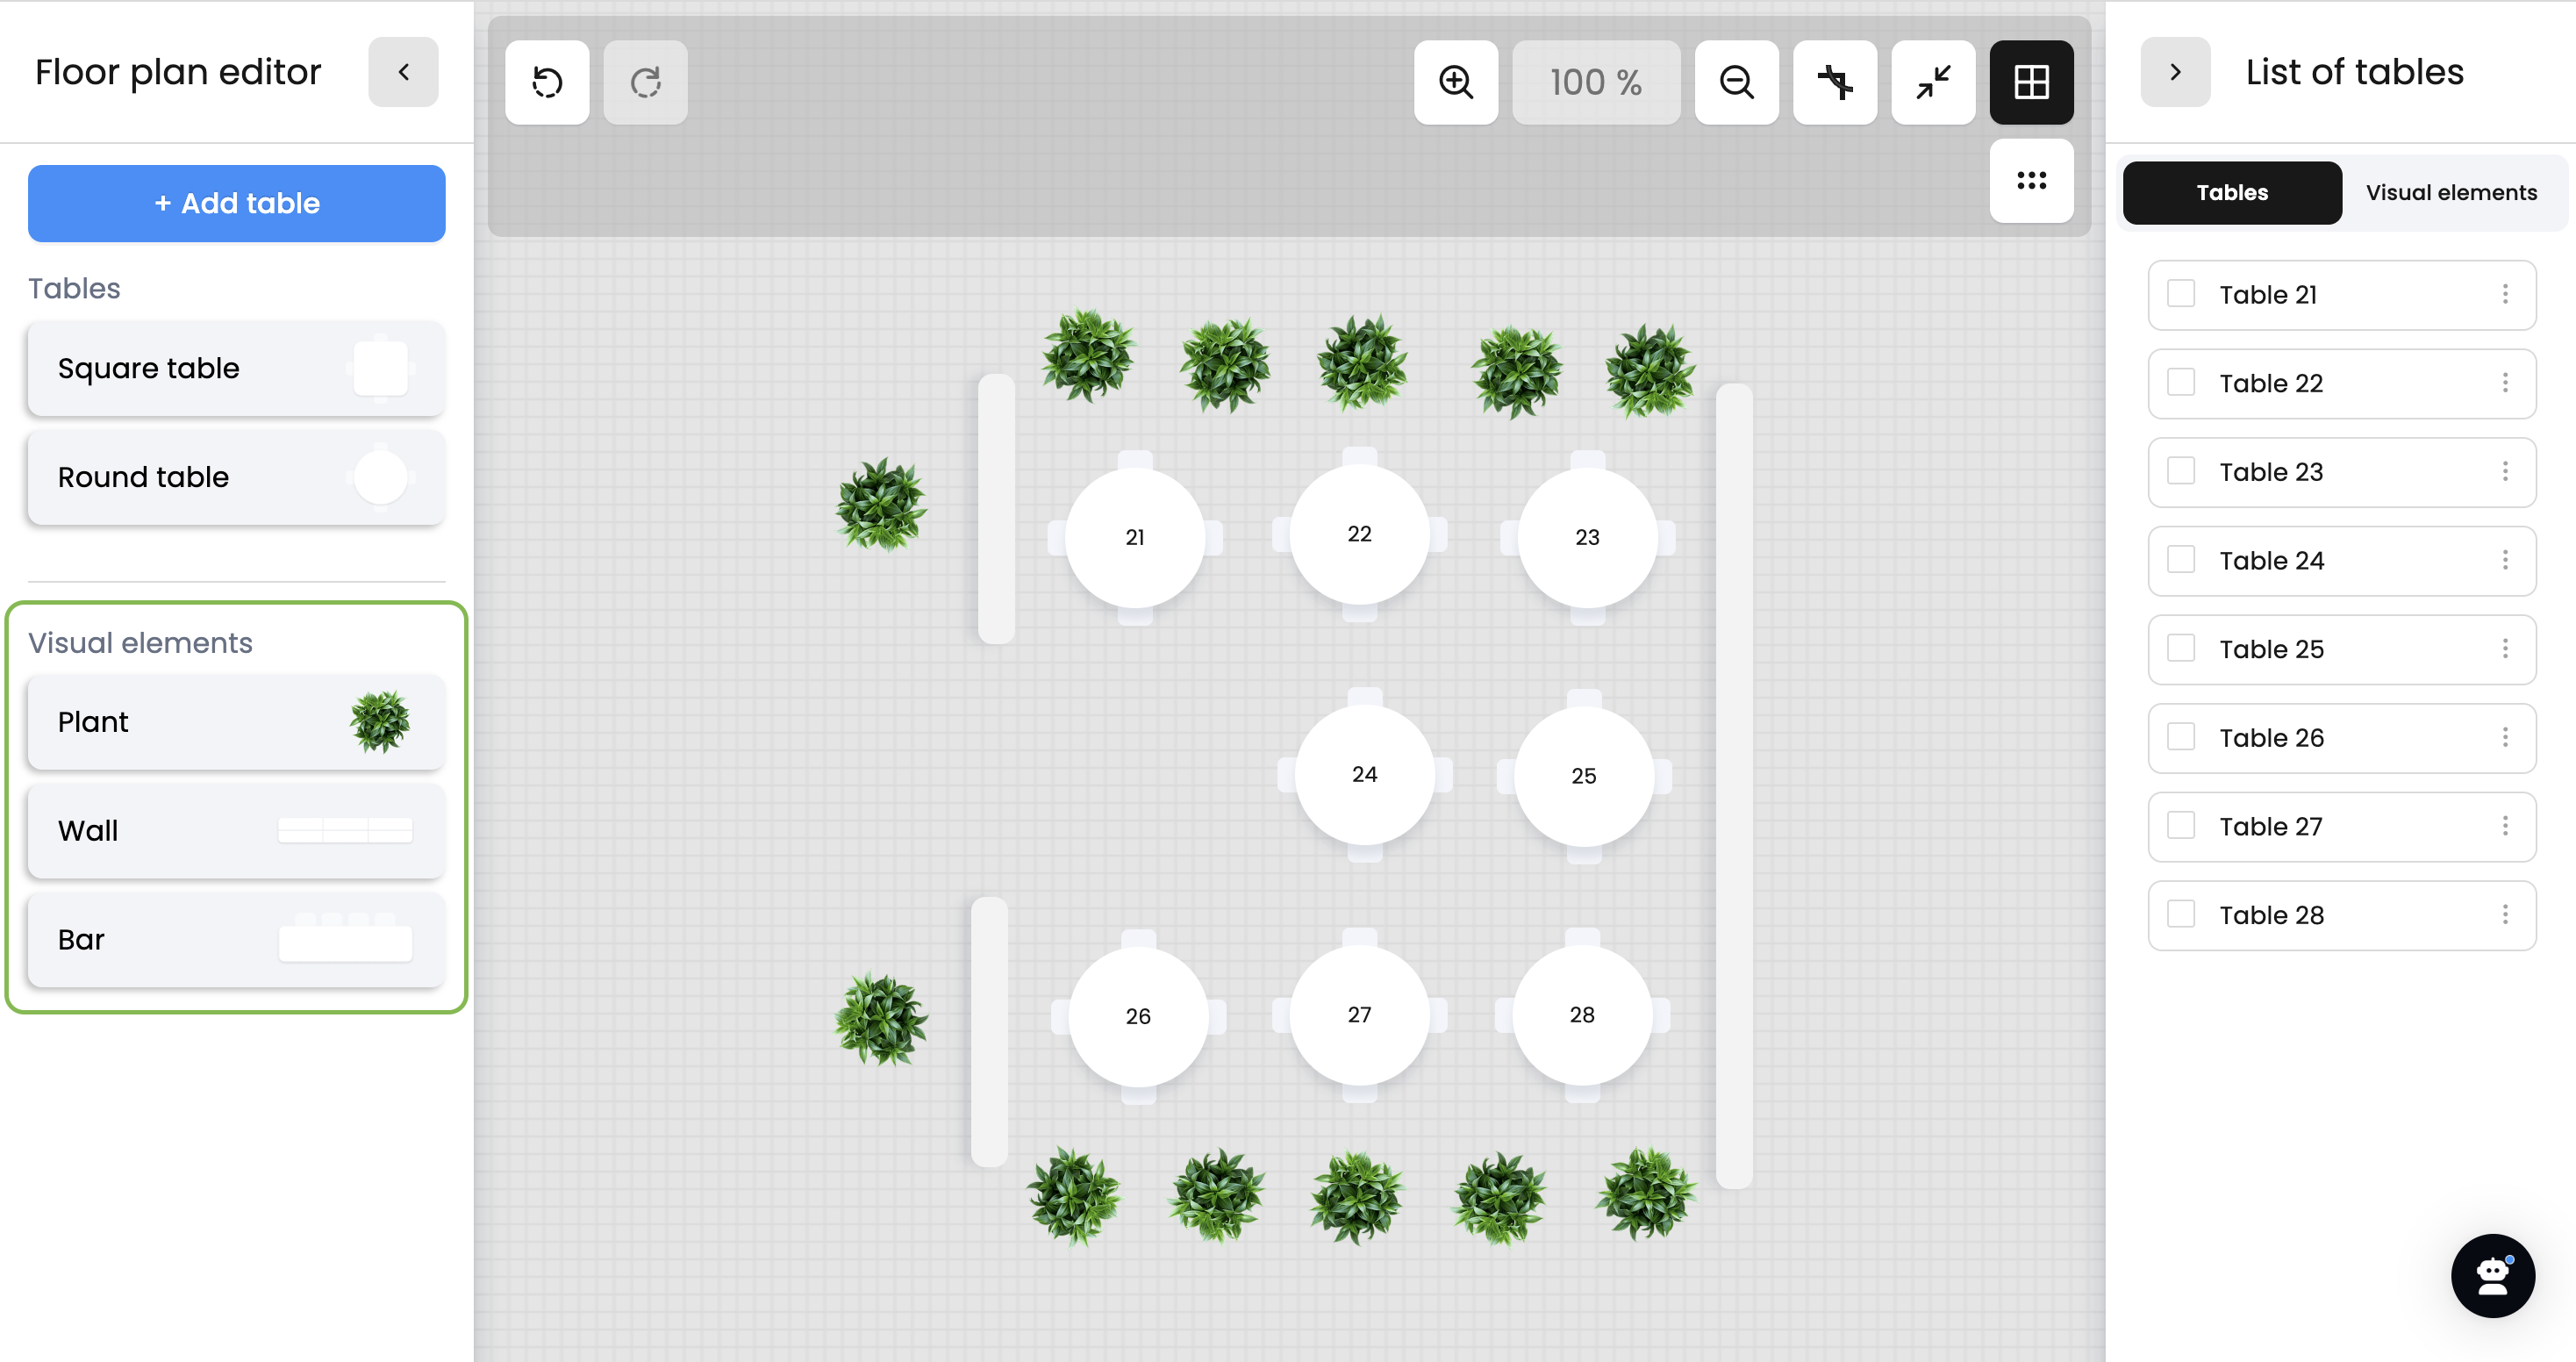
- Add visual elements such as walls, bars, and plants
- Rename visual elements such as walls or bars as needed (e.g. you can rename a bar element to 'entrance' or 'kitchen').
Tip: At the top left corner of the page, you can switch between different spaces and modify them in turn.
- Click 'Save'.
Also, you can use the 'undo' function to discard previous changes. To do this, click on the 'arrow' icon featuring undo action.
Remove and Restore Spaces
To remove a space, click the bin icon and confirm the action. To display all spaces that have been removed from your location, select the 'Removed spaces' checkbox in the top-right corner.
You can also restore any removed space, provided you have not reached the maximum number of Table Plans supported by your subscription plan.