Discounts and Periods
Who can use this feature?
☑️ Location Owners | ✅ POS Users
When configuring Discounts, you can define their duration by setting a Period. After reaching the expiration date and time, the Discount will be automatically deactivated. To do this, you first need to set a Period and then assign the Discount to it.
Set a Period
To set a specific Period, please follow these steps:
- Navigate to General > Periods.
- Click 'Add new period'.
- Provide a name for General.
- Click 'Add new period'.
- Provide a name for your new Period.
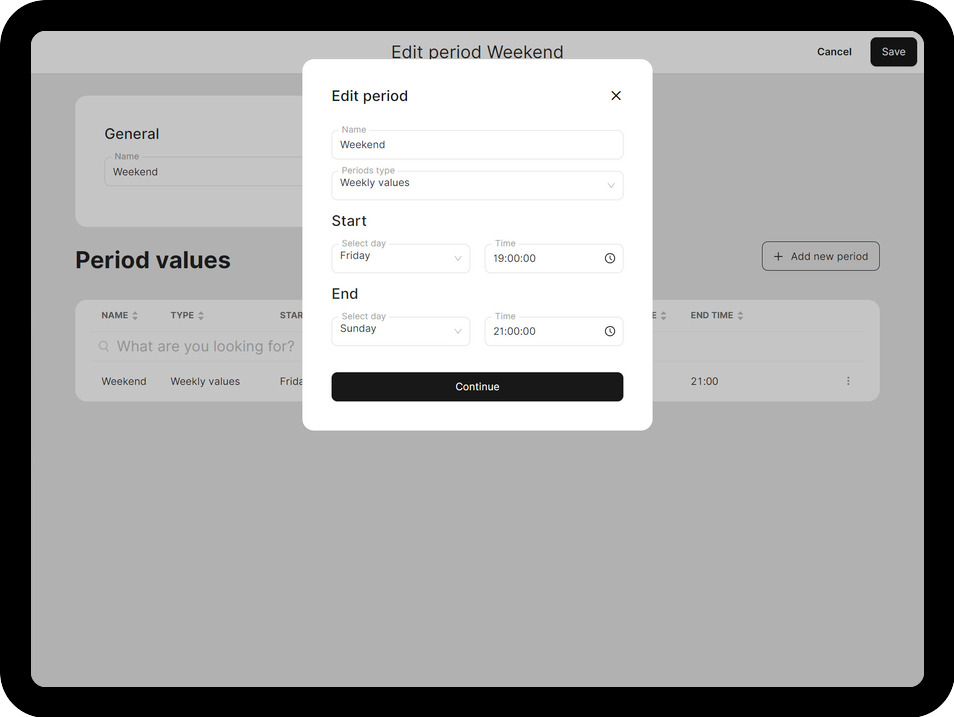
- Specify the 'Periods type'.
| Periods type | Description |
|---|---|
| Weekly values | Set the specific day and hours for the Discount. This schedule will repeat weekly. |
| One-time use values | Determine a single Period for your Discount. |
| Annual values | Set a timeframe for the Discount that will repeat annually. |
| Daily values | The Discount is valid daily. Define the active hours. |
- Based on your selected 'Periods type', specify the time limitations.
-d9c216ca1a7e4dc5cec4fa5f066986ad.jpg)
- Click 'Continue'.
- Click 'Save'.
Apply Period to Discount
To apply Period to a Discount, please follow these steps:
- Navigate to General > Discounts.
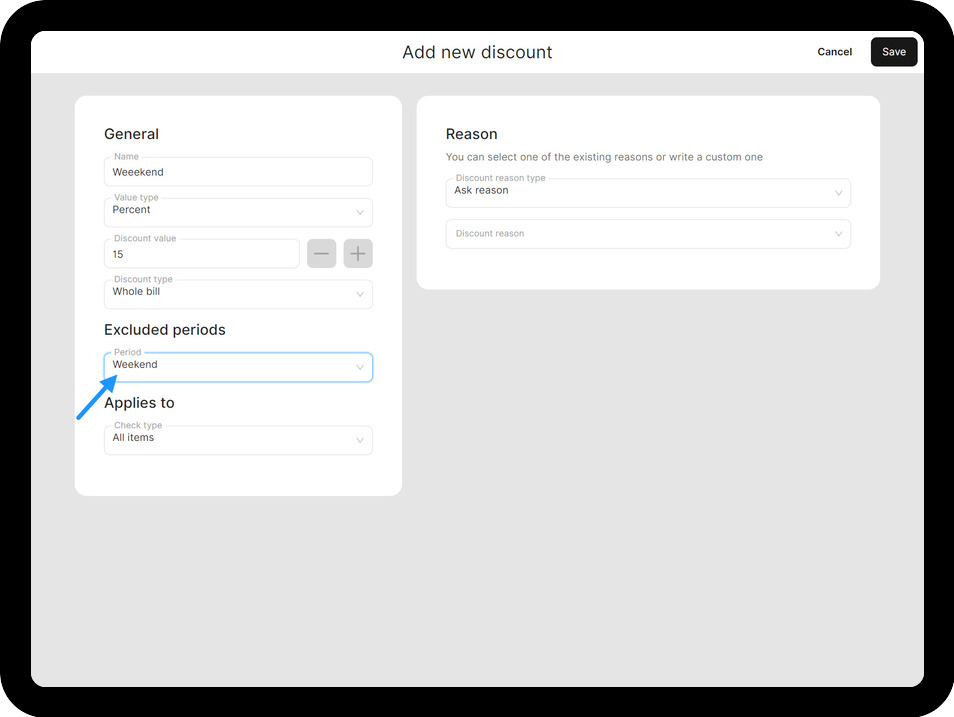
- Click 'Add new discount'.
- Enter the required information and note the 'Excluded period'.
- Click on the 'Excluded period'.
- Select the newly created Period.
-c6b64d60b2a244136355b0d675d3853d.jpg)
Apply Discount in the POS
To apply a Discount with a Period in the POS, follow these steps:
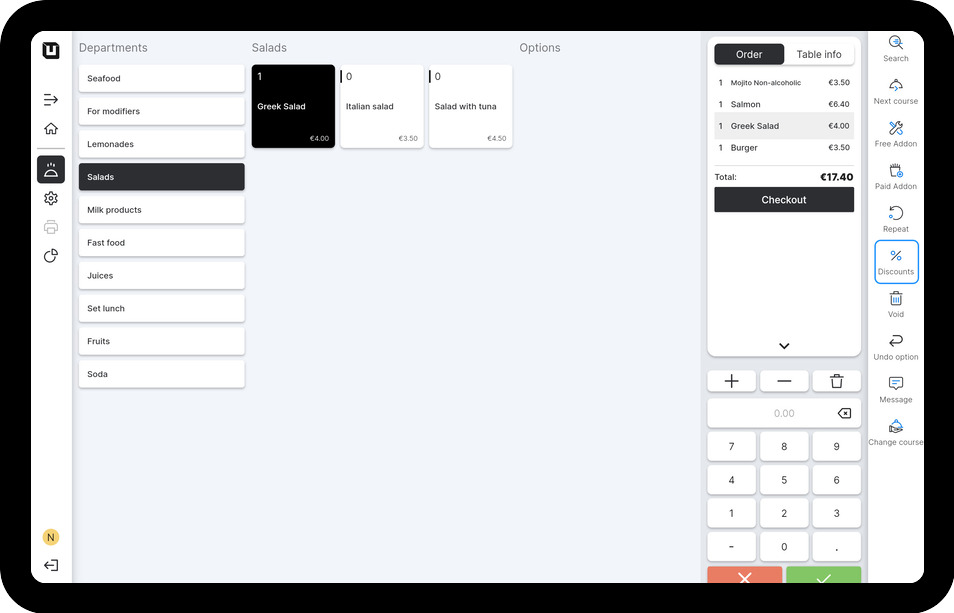
- Open the unTill Air app on your screen.
- Create any order.
- Tap on the 'Discounts' button.
-6f02c545345f5d487bf774d405a9ced5.jpg)
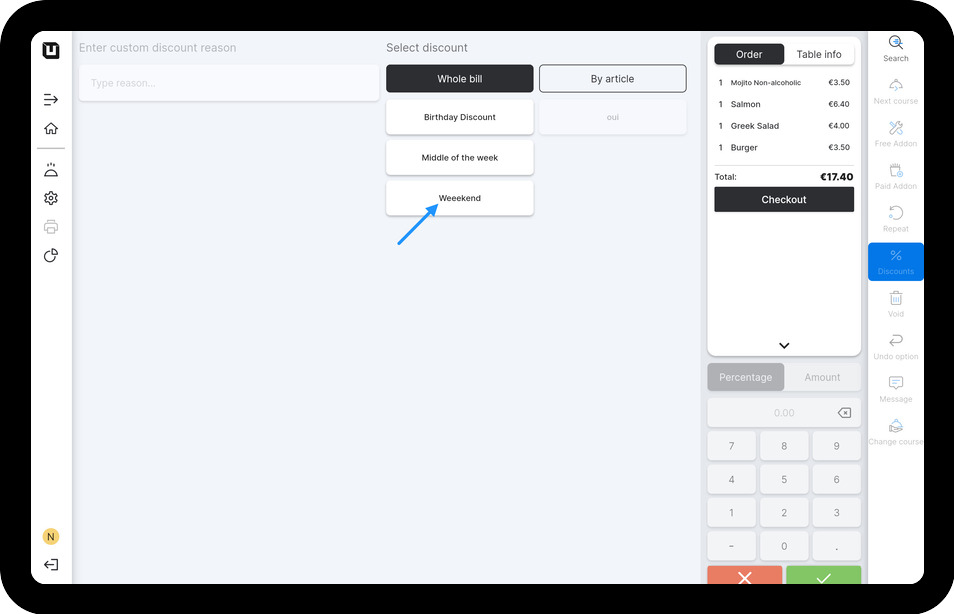
If the period you set is currently active, the time-specific Discount will be visible in the POS Discounts section.
- Select the Discount with Period and complete the order.
-02e938531e874b58f86a81481608a53a.jpg)
As a result of applying the Discounts, you will notice a reduction in the total order amount.